Showing posts with label dessert. Show all posts

Monday, March 4, 2013

Every Day I'm Trufflling...

So, while reviewing my cart on the check-out line at Whole Foods, I picked up one of the few packaged items among the heaps of cruciferous and root veggies. It was one of may favorite treats, the 88% dark (not for amateurs!) chocolate bar by Endangered Species. It really is lovely bar/ company; all sustainably sourced ingredients, they donate 10% of net profits to wildlife preservation, not to mention (and most importantly) delicious. However, in my effort to save packaging/money/the world, I shifted my gaze to the bag of figs in my cart and remembered the huge bag of raw cacao powder in my fridge at home. And the rest is history...no, really, these truffles won't last very long!

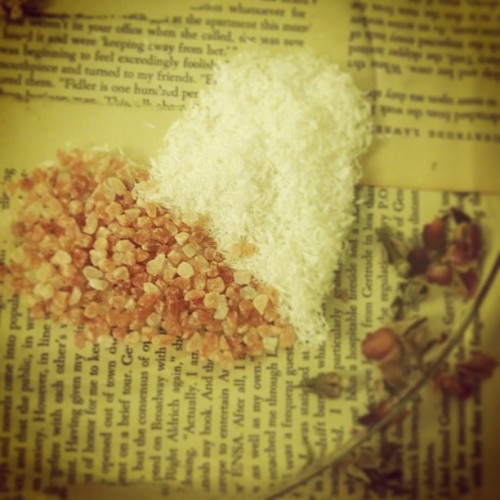
Pink salt, coconut flakes, rose petals and love

Ingredients: (makes 14 truffles) 
1 cup almond meal (alternatively, put whole almonds in a food processor and pulse until it reaches a flour-like consistency. You can also use another kind of nut or seeds such as sunflower to make them nut-free)
2/3 cup dried fid
4 generous tablespoons raw cacao powder (I purchased a two-pack of Navitas Naturals and put one in the freezer and keep one in my fridge. It's a bit of an investment at first, but it will last...or not if I keep making truffles :)
1/4 teaspoon vanilla extract
1/4 cup water (preferably filtered)

I'm an addict. A coconut addict, that is!

Toppings:
The options are really endless as this almond/fig combo creates a very versatile base. Here are the two versions I made, by feel free to play around!
Version #1: Cinna-Sesame (sesame seeds, ground cinnamon, pinch of cayenne pepper, pinch of ground ginger)

Version #2: Salted-Coconut (dried coconut flake with course pink Himalayan sea salt mixed in) I also stuck a little dried rose petal on top, just to make them extra fancy

Other ideas: bee pollen, dried lavender or other herbs, goji berries, cacao nibs...
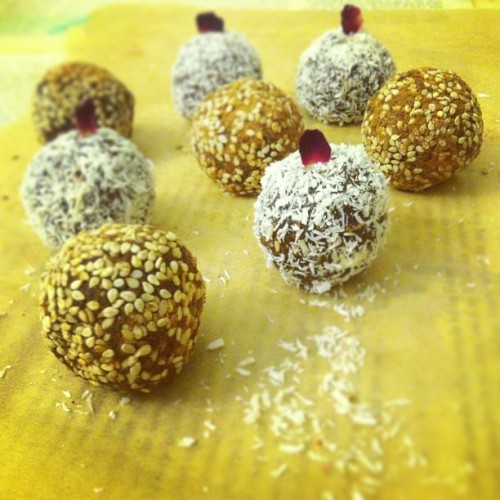
These taste as good as they look

Combine the almond meal, figs, cacao powder and vanilla extract in the base of a food processor.Process on high as you slowly stream the water into the running processor. It should form a sticky dough pretty quickly, but you may need to stop the machine and scrape down the sides. Using a measuring spoon, scoop out 1 TBS of the dough and roll it between your palms into a nice ball. Repeat until no dough remains. You should be able to make 14 truffles, though it will depend on the size of your balls (and also how much dough you use for each truffle. haha!) Get all your topping ingredients ready on a big plate. Have a small bowl of warm water handy to dip each truffle in before rolling the topping of choice to help it stick. I also found that coating my hands in coconut oil first prevented the dough from sticking, while simultaneously moisturizing my hands! These can be enjoyed immediately or stored in the freezer for later. 

Saturday, January 5, 2013

Cookie Party

This year my family decided to do secret santa for the holidays. After struggling to figure out how to actually use the online secret santa generator (yup, that's real-apparently hats are obsolete) I received an email informing me that I "drew" my cousin Danielle's name. With a $30 and even smaller budget of time, I knew homemade was the way to go. My cousin always enjoys whatever vegan delicacies I bring to our family gatherings, and who doesn't like cookies? Not having very much experience in the realm of baking, I took it upon myself to test out an array of recipes that seemed to cover the basic grounds of cookies. 


First up was these Carnival Cookies from Shutterbean. I was drawn to them not only because they were inherently vegan, gluten-free and relatively healthy, but I like the idea of using things I already had in my house, most notably popcorn! Popcorn? In a cookie? This was news to me. I think they could have been baked for a bit longer and wasn't that into the presence of the banana flavor. I usually don't mind it, but I think there was a little too much going on with these for my liking. 


Next up were the Flourless Coconut Chocolate Drops also from Shutterbean. While the airy texture of these cookies was quite pleasant, they are not entirely vegan due to the presence of egg whites and also contain white sugar, which only reinforced the fact that this stuff is totally devious and sends my head spinning. Bottom line: I felt so crazy after I ate these that it wasn't even worth it. I'll definitely look into adapting a healthier version next time. 


 The third stop on cookie experiment train was these gorgeous Almond Lace Cookies (recipe to follow) based off the Vegan Florentines from Oh She Glows. These were by far the healthiest and in my opinion the tastiest of the bunch. I got really good feedback from a predominantly non-vegan crowd, so I think that's pretty telling. Plus, aren't they pretty?


Vegan and Gluten-Free Almond Lace Cookies 

DRY::
1 3/4C sliced almonds (raw or blanched)
2 TBS flour (i used almond flour to make them gluten-free which you can buy at Trader Joes or just put some of the left over almonds in a blender for a bit, or use all-purpose flour if you have that)
1/4 tsp fine grain sea salt

WET::
1/4Cup coconut oil
1/2 Cup coconut sugar (or you can use cane sugar or Sucanant or I'm sure brown sugar, but i was sticking with a coconut theme and this is what I had)
2 TBS raw honey (or you can sub brown rice syrup or agave, anything sticky and sweet)
2 TBS Coconut cream (buy a can of full-fat coconut milk and place in the fridge, then when you open it later there scoop out 2 T of the "cream" that settles on the top)
1tsp vanilla extract

DIRECTIONS::
Place all dry ingredients in a bowl and mix well. Put oil, sugar, honey and coconut cream in a sauce pan and bring to a boil. Immediately remove from heat and add the vanilla extract. Fold in all the dry ingredients. With wet hands, roll 2tsp of mixture into a ball and place on a cookies sheet lined with parchment paper 3 inches apart (these will spread!!) Bake for 10 minutes at 275 degrees, then rotate pan and bake for another 7-10 minutes. Be careful not to burn! Slide parchment paper onto a wire rack or other surface that is not hot and allow to cool for 5 minutes. then transfer to a plate lined with paper towels and block excess oil. Repeat until all the batter is gone. Once they are cooled you can drizzle them with melted chocolate to make it fancy. They apparently will keep in the freezer for two months, but they only lasted three days at my house :)

Tuesday, July 10, 2012

Death Row Chocolates

No, there isn't anything in this recipe that will get you the death sentence, but I did have an epiphany while savoring a few of these badboys that if I had to choose my last meal before execution, it would probably include these. Maybe a glass of champagne to go with? Oooh, I'm going to the chair, not the club... Anyways, these are so decadent and delicious that you will find yourself wanting them for your last meal and pre-meal too! I chose to make mine mostly raw because I'm kinda on that train right now, but you  can sub regular chocolate chips in for the cacao butter/ powder. 


I've been a little intimidated by the idea of making my own raw chocolates for a while. I mean, there are so many amazing brands that I've tried over the years, how could I compete? But when I was perusing one of my favorite West Village health food stores and found a funky little company that stone grinds whole Balinese cacao beans into a powder and then paste (assuming from the oils that are released) and then leaves it to harden into little bricks so they can easily be melted down over low-heat, I knew my time to delve into the world of raw chocolate making had arrived. (wow was that a run-on or what?!)


Sooo...I did exactly what the package told me to. I melted the little bricks of chocolate in a double-boiler and added a sweetener of my choice (maple syrup). I also added equal parts of coconut oil to make the chocolate extra silky smooth. I believe the ratio went something like this:


1 cup chocolate : 3tsp maple syrup : 3tsp coconut oil


As soon as all the ingredients were well combined, I turned off the heat and quickly (very key here) began dipping my strawberries into the mix. I poured the remaining chocolate concoction into heart shaped rubber ice cube trays (I think from Ikea?) which I had prepared by sprinkling half with Himalayan sea salt and the rest with coconut flakes so that they would rest on top of the chocolates after they hardened.  

It was so rewarding to have a healthy (chocolate is really good for you, okay!) treat on hand, and even more so because I knew exactly what went into making them; ingredient and labor wise. I learned a. to stop being intimidated by seemingly daunting tasks b. everything tastes better when you make it from scratch, no matter how imperfect looking it may turn out and finally,  c.  chocolate + sea salt= best combination. ever. 

Wednesday, June 27, 2012

Slow:Fast:Foods

For my last time cooking at the artist's residency where I spent the last month cohabiting, co-creating and co-cooking (?) with 13 other people, I decided to make a healthy, vegan (shocker! I know!) fun, "fast food-inspired" meal. What came to mind? Burgers. Fries. Cookies. Done. 


The meal started off with a vegan caesar salad inspired by The Kind Diet, that I topped with gluten-free rosemary-polenta croutons 
For the dressing (serves 6-8 people):
2 Tbs almonds
3 Cloves garlic, minced
3 Tbs Dijon mustard
2 Tbs Tamari soy sauce
1 Tbs tahini
3 Tbs fresh lemon juice
2 Tbs extra-vergin olive oil


2 or 3 large heads of romaine lettuce, torn into bite-sized pieces 


For the croutons:
1 Cup polenta
2 Cups water
Rosemary, dried
Garlic powder
Sea salt


Bring the water to a boil, then slowly add the polenta whisking briskly to avoid any clumps from forming. Lower flame and allow to simmer, stirring continuously for about 5 minutes. Turn off heat, stir in salt and herbs and then pour into a square, heat-proof dish. Allow to cool completely while you make other components of the salad.
To make the dressing, place all the ingredients into a food processor; process until smooth and well blended. Add water if need. 


Sweet Potato Fries:
5 big sweet potatoes
Coconut oil
Cajun spice seasoning + a bit of salt to taste


Simply wash and slice the potatoes into french fry shape. Lay them down on a baking sheet (will need multiple if making a big batch) making sure they don't touch; this will allow them to crisp up. Coat them evenly in coconut oil (if the oil has turned to a solid, simply scoop some out and rub it between your hands) and then dowse them in cajun seasoning. Bake for approximately 40 minutes at 400 degrees, or unit they have reached desired crispiness!


Black Bean Burgers (via  GOOP curtesy of Candle 79) (Makes 6-8 burgers)
2 cans black beans
2 cups chopped yellow onion
1 tsp chipotle chili powder
2 tsp salt
black pepper to taste
cumin to taste 
1 1/2 cups brown rice
3 cups water
1 Tbs olive oil
1 cup raw pumpkin seeds 
1 Tbs smoked paprika
sliced red onion, tomato and lettuce for serving
whole grain burger buns, toasted


Bring the water to a boil and add brown rice, lower to a simmer and cover until rice is tender and all the water is absorbed, about 40 minutes. Add the chopped onion and cover for 10 minutes. Heat the olive oil in a sauté pan over medium-high heat. Add the pumpkin seeds, paprika and 1tsp of salt and season with pepper. Cook the seeds, stirring and shaking the pan until they are lightly toasted, about 3-5 minutes. Set aside to cool. Combine the drained beans, rice and pumpkin seeds in a large bowl, add the remaining spice and stir. Place half the mixture into the food processor until smooth. Return the processed mix to the big bowl and stir into the unprocessed mix. Form patties about 3 1/2 inch in diameter and 1 inch thick. Brush a baking sheet with olive oil and bake at 350 degrees until browned, about 20 to 30 minutes, flipping halfway through cooking. Alternatively, you can pan fry them in olive oil, about 4 minute per side. Slather in condiments as you desire and enjoy!


And finally...if you aren't already bursting at the seams...


Gluten-free and Sugar-free Chocolate Chip Cookie Pie (via Chocolate Covered Katie)
2 cans white beans or garbanzos (drained and rinsed well) (500g total, once drained)
1 cup quick oats (or certified-gf quick oats)
2 cups pitted dates 
4 stevia packs, or 1/8 tsp uncut 
3/4 tsp salt
2 tsp baking powder
1/2 tsp baking soda
1/4 cup unsweetened applesauce
2/3 cup milk of choice (I used almond)
3 tbsp oil (canola, veg, or coconut)
1 tbsp pure vanilla extract
1 cup chocolate chips 


Preheat oven to 350 F, and grease a 10-in springform pan (or two 8-in round pans). Combine all dry ingredients (except chips) in a large bowl. In a separate bowl, combine all wet ingredients. Place dry and then wet ingredients into a food processor and blend until super-smooth (where there are no date pieces to be seen). Stir in the chocolate chips, and pour into the pan or pans. Bake 35-40 minutes, then let cool at least 15 minutes before trying to remove it. Slice and devour! 

Sunday, June 17, 2012

Peach and blueberry crumble

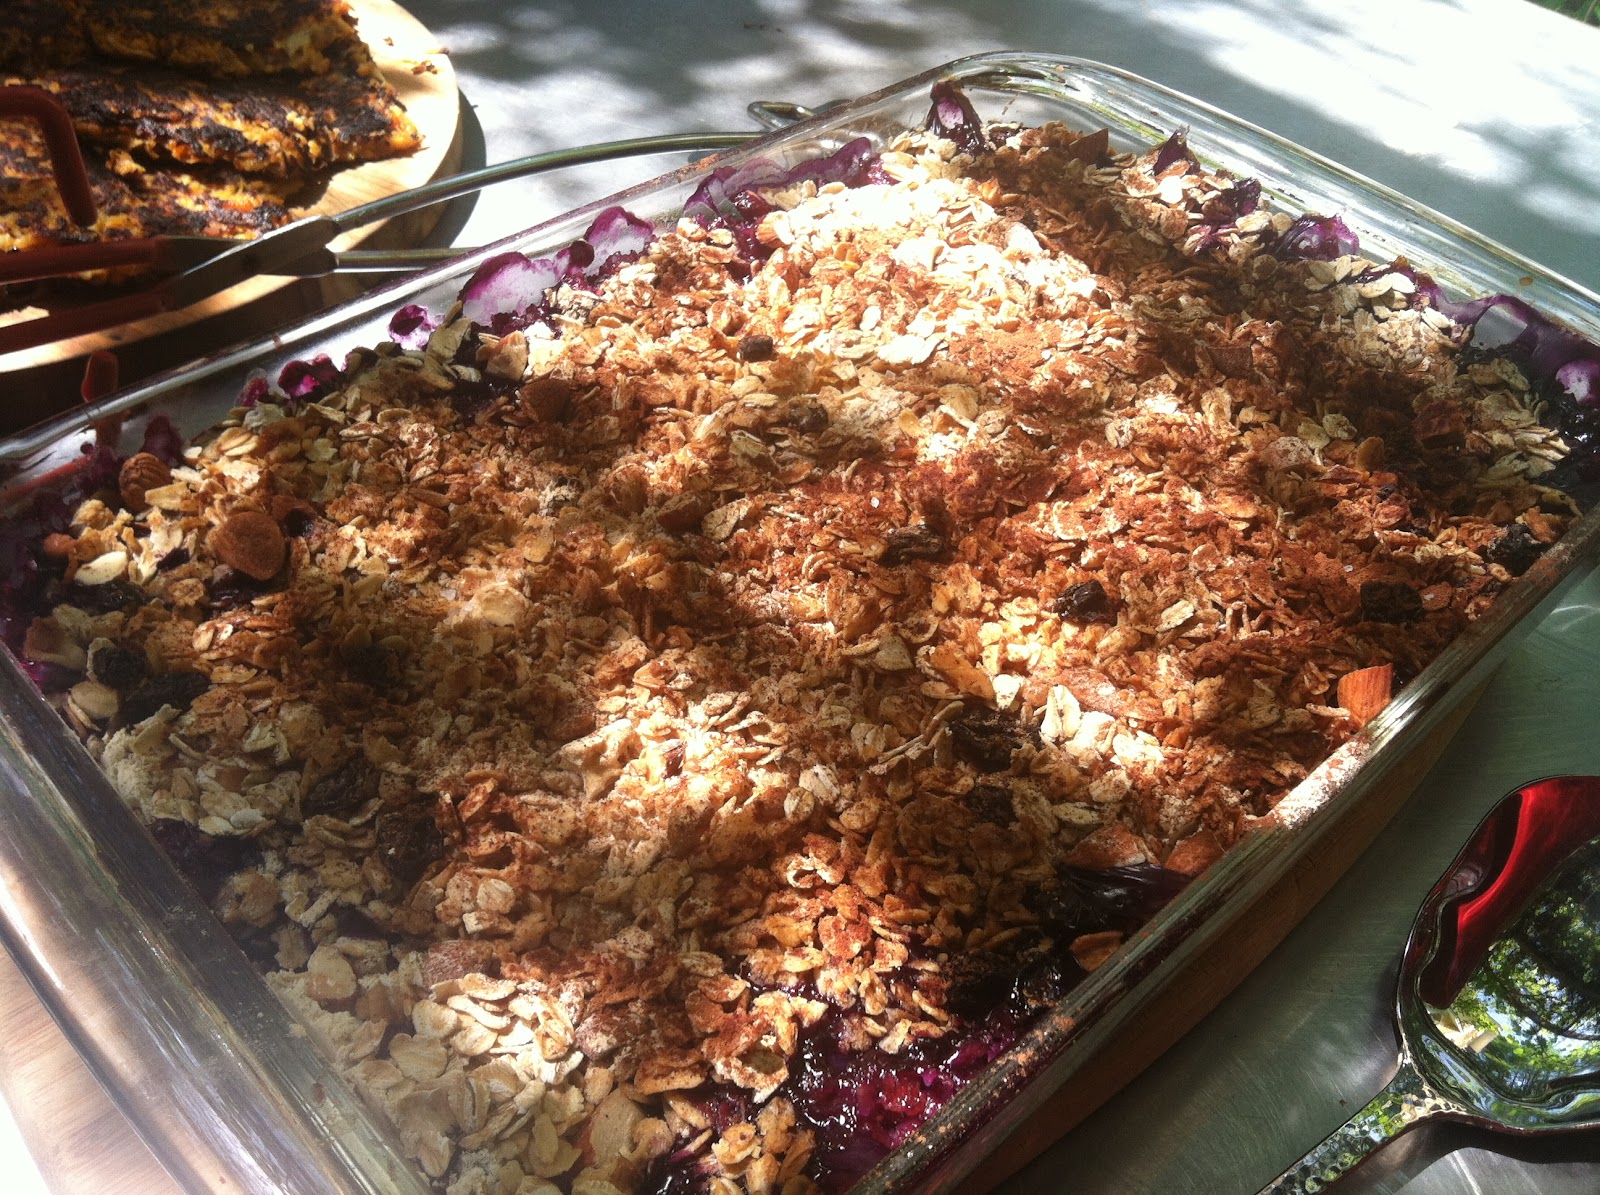
Today we had brunch out on the patio. It was my turn to cook brunch so I decided to make my favorite breakfast/ dessert, peach crumble. I also made some sweet potato pancakes with apple sauce. The were both so good and tasted especially amazing eaten outside :)
Ingredients:
For the filling:
12 cups fruit, enough to almost fill pan (6cups canned peaches, 6 cups frozen blueberries)
1/2 cup reserved pear juice from the canned peaches
1-3 teaspoons lemon juice, to taste
1-3 tablespoons cornstarch, depending on juiciness of fruit
1 teaspoon spice, like cinnamon, ginger, or nutmeg (optional)
For the crumble topping:
2 cup flour (oat, quinoa, brown rice or all purpose)
5 cups rolled oats
1 cup maple syrup
1 teaspoon baking powder
1/2 teaspoon cinnamon (optional)
1/4 teaspoon salt
8 tablespoons coconut oil
1 cup chopped nuts (walnuts, almonds etc.)
Heat oven to 375°F.
If necessary, dice the fruit into bite-sized pieces. Toss the fruit with, lemon juice, cornstarch, and any spices. Use more sugar and less lemon juice when cooking with tart fruits like rhubarb and blackberries, and less sugar but more lemon juice for sweet fruits like peaches and plums. Best is to taste a piece of fruit and adjust to taste. Use more cornstarch with very juicy fruits like plums and less with firm fruits like apples. But don't worry; no matter your ratio of these ingredients, your crumble will be delicious.
In a large bowl, thoroughly mix the flour, oats, nuts, maple syrup, cinnamon, baking powder, and salt for the crumble topping. Break the coconut oil (or butter) into a few large pieces and toss these in the dry ingredients. Using your fingers or a fork to mix the dry ingredients until all the ingredients are coated with oil and large heavy crumbs are formed. Then, pour the crumble topping evenly over the fruit.
Bake the crumblefor 30-35 minutes until the fruit juices are bubbling around the edges of the pan and the topping is firm to the touch.
Let the crumble cool for at least 15 minutes before eating. If transporting to a picnic or party, let the crumble cool completely to give the fruit filling time to set. Crumbles will keep, covered and refrigerated, for up to a week. Serve cold, room temperature, or re-warmed in a low oven for 20 minutes.


Wednesday, June 13, 2012

A sweet birthday and a sweet pie

Today is my birthday! Woo 22! I've never been a huge fan of birthdays I took it pretty easy for most of the day, which was a nice contrast to most birthdays, which tend to be filled with high expectations and too many activities for one's good. I started off the day with some restorative yoga and watercolored a card to send send to my dad for father's day. Then I just texted or spoke on the phone to all the people who are really important to me, which reminded me of all the amazing people I have in my life. I think because I didn't try to make a big deal out of the day, it ended up being one of the best birthdays I've had in a while.
Flowers my amazing mama sent me. Note the "Ms. Farth" on the card ha


I made a semi-raw pumpkin pie for my birthday cake (I know, but I really wanted to cook on the day of my birthday). Two other people cooked a delicious dinner for everyone. Here's what our table scape looked like:
INGREDIENTS::


Raisin-Walnut Crust:
3 Cups almond flour (almonds pulverized in a food processor)
2 cups walnuts (add these at the end so some remain whole)
2 cups raisins 
1/2 cup maple syrup
3 Tbsp coconut oil
1-4 Tbsp water (for blending, depending on how )


Pumpkin Chia Filling:
6 Cups canned pumpkin puree
2/3 Cup unsweetened almond milk
1 Cup pure maple syrup
6 Tbsp chia seeds
4 Tbsp fresh grated ginger
8 Tbsp pumpkin pie spice


Maple Whip:
3 Cans coconut milk (chilled in the fridge for at least one hour)
1/3 Maple syrup


Topping:
1/2 Cup Vegan chocolate chips

Whisk all the filling ingredients together in a bowl until smooth. Set in fridge to chill.


If making your own almond flour, place almonds in a food processor one cup at a time until ground to a powder. Add raisins and walnuts and pulse to combine. Add oil and drizzle maple syrup until a dough is formed. Add water if it seems too dry. 

Place dough into a pan and press down into edges to form a crust with your fingers. I greased the pan and my hands with coconut oil to prevent sticking. Place the crust in the freezer for a half hour.


Pour pudding into the crust. Melt the chocolate chips in a double boiler and drizzle over the pie. Allow to chill for at least an hour before serving


To make the coconut maple whip cream, place the cans of coconut milk in the fridge and chill for an hour. Once chilled, remove the cans and scoop out only the solidified coconut milk, leave the liquid in the can and use for a smoothie or just drink it straight! 
Add maple syrup and whip with a hand mixture until it resembles whipped cream.


The pie wasn't the only sweet thing I enjoyed on my bday. After dinner, I was  blindfolded and lead up the stairs. Then I sat down in a chair and was lifted and spun around hava-nagila style before being placed down on the ground. All the musicians in the house played music and everyone else came around and whispered nice things in my ear. I felt so disoriented not only because I had no clue what was going on, but because I never expected anyone (let alone a group of people I've only known for a week and change) to surprise me with something so sweet and thoughtful. It was a truly magical day.


Monday, January 16, 2012

raw cacao snowballs


Even though it hasn't snowed yet here in New York (hellooo global warming?) I've been enjoying these entirely raw, chocolatey snowball-looking treats (I mean how could something chocolate that looks like a snowball be bad?) as dessert and also giving them as holiday gifts. They are super simple to whip up and a great alternative to processed treats to feed your sweet tooth! This recipe was inspired by a few different raw treats I have tried over the years, but mostly came from this recipe for raw brownies over at Lookbook Cookbook. If you haven't already checked out this site, I highly recommend!

Ingredients:
(makes 12 snowballs)
1/2c raw walnuts
1/2c almond meal
1c pitted dates
4Tbsp raw cacao powder
1/4tsp vanilla extraxt
dash of salt

about 1/2c coconut flakes for rolling


Just testing to make sure they're not poisonous ;)

Combine the first 6 ingredients in a food processor. I added the walnuts in last and just gave them a few pulses so there would be whole chunks in the mix. The mixture should stick together between your fingers a little. Don't overmix, as it will release the oils from the nuts. You can add a few drops of water if it isn't sticking together at all.Roll the batter into the size of golf balls, then roll in the coconut flakes. Place on a plate in the freezer for at least 30 minutes to harden. Enjoy!
Did I mention these make a great gift?
*yes it is vital to overly wrap them in girly pink bows & things

Monday, December 19, 2011

What to bring to a holiday party?

Umm cookies, duh!

I am always trying to subtly turn my meat-devouring family members (who I love very much) onto the deliciousness that is vegan food. My most effective approach has been to make really yummy vegan food whenever we have a family gathering and either leave these dishes out on the table with the rest of the food, or I make a special treat and wrap 'em up real cute and give them as gifts. Whether I pose them as a gift or "regular food", everything always gets eaten.

I made these cookies a while back, I think as father's day gifts, but they would also make really great holiday presents. I took the original veganized recipe and made a few changes to make them gluten-free as well and also to use up a bunch of very ripe bananas I had on hand. They came out great and where really fun (had a little too much fun with this part) to decorate! They would even be a great project to work on together if you weren't trying to hide the absence of milk and butter from the eventual consumers!

Chocolate-dipped peanut butter-banana cookies:

1 cup chunkyy peanut butter
½ cup dairy free margarine, softened (I used Earth Balance brand, could also sub in coconut oil if you wanted to make these less processed and even more crazy flavored!)
½ cup brown sugar, firmly packed
½ cup sugar
¼ cup mashed really ripe banana
½ teaspoon vanilla
1 ½ cups gluten-free flour
½ teaspoon baking powder
½ teaspoon baking soda
½ teaspoon salt
½ cup almonds, chopped
2 cups dairy free chocolate chips
½ cup sugar
2 tablespoons dairy free margarine

Heat your oven to 400 degrees

In a large bowl beat together peanut butter, margarine, brown sugar, and granulated sugar until light and creamy. Add banana and vanilla.

In a medium bowl combine flour, baking powder, baking soda and salt.

Add flour mix to peanut butter to and stir well.


Cover bowl and refrigerate for 20 – 30 minutes. Make balls about the size of a golf ball, roll in sugar and place on ungreased cookie sheet.


Using a fork make crisscross pattern flattening cookies slightly. Bake for 10 to 12 minutes.


Remove cookies from the oven and cool on a wire rack (after testing a little piece to make sure they aren't poisonous of course!)

Place a sheet of waxed paper over a cool cookie pan or plate.


Next, heat the chocolate in a small saucepan over low heat. As it begins to melt add the margarine. Once the chocolate is melted, begin dipping half of each cookie in the chocolate, using a spoon to help spread the chocolate evenly over the cookie. Don’t be shy here, a nice thick coating is what you’re looking for.

Place the chocolate-dipped cookie on the waxed paper. Then the fun part! Decorate (or in my case, over-decorate!) with whatever sprinkles, chopped nuts etc you have on-hand. Be sure to do this as you dip each cookie because the chocolate will set quickly. Once you’ve filled up this tray with dipped cookies, place the tray in the fridge to help set the chocolate.

Got a leeeetle bit carried away
When everything has cooled an hardened, stack about 4-5 cookies on top of each other, wrap up in parchment paper and tie with a ribbon. Viola!