Showing posts with label chocolate. Show all posts

Monday, March 4, 2013

Every Day I'm Trufflling...

So, while reviewing my cart on the check-out line at Whole Foods, I picked up one of the few packaged items among the heaps of cruciferous and root veggies. It was one of may favorite treats, the 88% dark (not for amateurs!) chocolate bar by Endangered Species. It really is lovely bar/ company; all sustainably sourced ingredients, they donate 10% of net profits to wildlife preservation, not to mention (and most importantly) delicious. However, in my effort to save packaging/money/the world, I shifted my gaze to the bag of figs in my cart and remembered the huge bag of raw cacao powder in my fridge at home. And the rest is history...no, really, these truffles won't last very long!

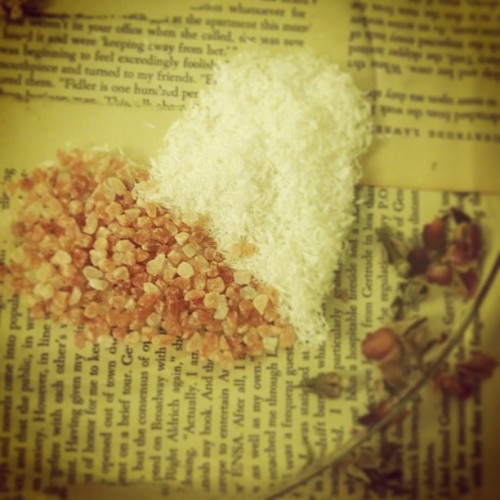
Pink salt, coconut flakes, rose petals and love

Ingredients: (makes 14 truffles) 
1 cup almond meal (alternatively, put whole almonds in a food processor and pulse until it reaches a flour-like consistency. You can also use another kind of nut or seeds such as sunflower to make them nut-free)
2/3 cup dried fid
4 generous tablespoons raw cacao powder (I purchased a two-pack of Navitas Naturals and put one in the freezer and keep one in my fridge. It's a bit of an investment at first, but it will last...or not if I keep making truffles :)
1/4 teaspoon vanilla extract
1/4 cup water (preferably filtered)
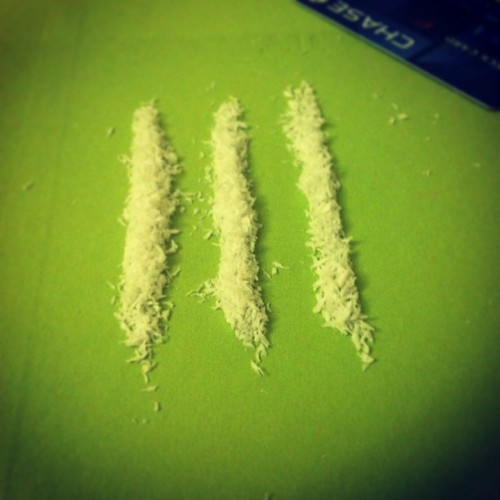
I'm an addict. A coconut addict, that is!

Toppings:
The options are really endless as this almond/fig combo creates a very versatile base. Here are the two versions I made, by feel free to play around!
Version #1: Cinna-Sesame (sesame seeds, ground cinnamon, pinch of cayenne pepper, pinch of ground ginger)

Version #2: Salted-Coconut (dried coconut flake with course pink Himalayan sea salt mixed in) I also stuck a little dried rose petal on top, just to make them extra fancy

Other ideas: bee pollen, dried lavender or other herbs, goji berries, cacao nibs...
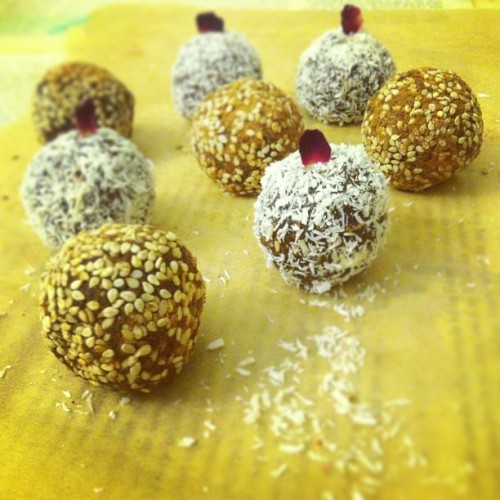
These taste as good as they look

Combine the almond meal, figs, cacao powder and vanilla extract in the base of a food processor.Process on high as you slowly stream the water into the running processor. It should form a sticky dough pretty quickly, but you may need to stop the machine and scrape down the sides. Using a measuring spoon, scoop out 1 TBS of the dough and roll it between your palms into a nice ball. Repeat until no dough remains. You should be able to make 14 truffles, though it will depend on the size of your balls (and also how much dough you use for each truffle. haha!) Get all your topping ingredients ready on a big plate. Have a small bowl of warm water handy to dip each truffle in before rolling the topping of choice to help it stick. I also found that coating my hands in coconut oil first prevented the dough from sticking, while simultaneously moisturizing my hands! These can be enjoyed immediately or stored in the freezer for later. 

Tuesday, July 10, 2012

Death Row Chocolates

No, there isn't anything in this recipe that will get you the death sentence, but I did have an epiphany while savoring a few of these badboys that if I had to choose my last meal before execution, it would probably include these. Maybe a glass of champagne to go with? Oooh, I'm going to the chair, not the club... Anyways, these are so decadent and delicious that you will find yourself wanting them for your last meal and pre-meal too! I chose to make mine mostly raw because I'm kinda on that train right now, but you  can sub regular chocolate chips in for the cacao butter/ powder. 


I've been a little intimidated by the idea of making my own raw chocolates for a while. I mean, there are so many amazing brands that I've tried over the years, how could I compete? But when I was perusing one of my favorite West Village health food stores and found a funky little company that stone grinds whole Balinese cacao beans into a powder and then paste (assuming from the oils that are released) and then leaves it to harden into little bricks so they can easily be melted down over low-heat, I knew my time to delve into the world of raw chocolate making had arrived. (wow was that a run-on or what?!)


Sooo...I did exactly what the package told me to. I melted the little bricks of chocolate in a double-boiler and added a sweetener of my choice (maple syrup). I also added equal parts of coconut oil to make the chocolate extra silky smooth. I believe the ratio went something like this:


1 cup chocolate : 3tsp maple syrup : 3tsp coconut oil


As soon as all the ingredients were well combined, I turned off the heat and quickly (very key here) began dipping my strawberries into the mix. I poured the remaining chocolate concoction into heart shaped rubber ice cube trays (I think from Ikea?) which I had prepared by sprinkling half with Himalayan sea salt and the rest with coconut flakes so that they would rest on top of the chocolates after they hardened.  

It was so rewarding to have a healthy (chocolate is really good for you, okay!) treat on hand, and even more so because I knew exactly what went into making them; ingredient and labor wise. I learned a. to stop being intimidated by seemingly daunting tasks b. everything tastes better when you make it from scratch, no matter how imperfect looking it may turn out and finally,  c.  chocolate + sea salt= best combination. ever. 

Monday, December 19, 2011

What to bring to a holiday party?

Umm cookies, duh!

I am always trying to subtly turn my meat-devouring family members (who I love very much) onto the deliciousness that is vegan food. My most effective approach has been to make really yummy vegan food whenever we have a family gathering and either leave these dishes out on the table with the rest of the food, or I make a special treat and wrap 'em up real cute and give them as gifts. Whether I pose them as a gift or "regular food", everything always gets eaten.

I made these cookies a while back, I think as father's day gifts, but they would also make really great holiday presents. I took the original veganized recipe and made a few changes to make them gluten-free as well and also to use up a bunch of very ripe bananas I had on hand. They came out great and where really fun (had a little too much fun with this part) to decorate! They would even be a great project to work on together if you weren't trying to hide the absence of milk and butter from the eventual consumers!

Chocolate-dipped peanut butter-banana cookies:

1 cup chunkyy peanut butter
½ cup dairy free margarine, softened (I used Earth Balance brand, could also sub in coconut oil if you wanted to make these less processed and even more crazy flavored!)
½ cup brown sugar, firmly packed
½ cup sugar
¼ cup mashed really ripe banana
½ teaspoon vanilla
1 ½ cups gluten-free flour
½ teaspoon baking powder
½ teaspoon baking soda
½ teaspoon salt
½ cup almonds, chopped
2 cups dairy free chocolate chips
½ cup sugar
2 tablespoons dairy free margarine

Heat your oven to 400 degrees

In a large bowl beat together peanut butter, margarine, brown sugar, and granulated sugar until light and creamy. Add banana and vanilla.

In a medium bowl combine flour, baking powder, baking soda and salt.

Add flour mix to peanut butter to and stir well.


Cover bowl and refrigerate for 20 – 30 minutes. Make balls about the size of a golf ball, roll in sugar and place on ungreased cookie sheet.


Using a fork make crisscross pattern flattening cookies slightly. Bake for 10 to 12 minutes.


Remove cookies from the oven and cool on a wire rack (after testing a little piece to make sure they aren't poisonous of course!)

Place a sheet of waxed paper over a cool cookie pan or plate.


Next, heat the chocolate in a small saucepan over low heat. As it begins to melt add the margarine. Once the chocolate is melted, begin dipping half of each cookie in the chocolate, using a spoon to help spread the chocolate evenly over the cookie. Don’t be shy here, a nice thick coating is what you’re looking for.

Place the chocolate-dipped cookie on the waxed paper. Then the fun part! Decorate (or in my case, over-decorate!) with whatever sprinkles, chopped nuts etc you have on-hand. Be sure to do this as you dip each cookie because the chocolate will set quickly. Once you’ve filled up this tray with dipped cookies, place the tray in the fridge to help set the chocolate.

Got a leeeetle bit carried away
When everything has cooled an hardened, stack about 4-5 cookies on top of each other, wrap up in parchment paper and tie with a ribbon. Viola!

Sunday, February 13, 2011

chocolate :)


I always have so much fun when I go out with my friend Jessika. We met 5 years ago at this single semester art school in Napa Valley, CA. Now we both go to college in New York and though we don't see each other as much as I'd like, it always seems like it was just yesterday even when we go six months without seeing each other's faces. We are also the best dinner buddies-we seem to always be in the mood for the same things! The other night we went out for a delicious dinner at Angelica's Kitchen. I got a combo bowl, which was yummy but kinda boring to photograph. Jessika also shares my love for chocolate, so after dinner we headed over to Stogo for tea and treats. Since we love all the same things, we thought it would be fun to share a few different chocolates. Here's what we got:

From L-R: Cocao V Cookies and Cream Bark, Peanut and Puffed Rice Cluster, Toasted Edamame Cluster, Spiced Dark Chocolate Tile (almost too pretty to eat...almost:) and two Cocoa Agave Truffles made by Brooklyn based chocolate company Fine and Raw Chocolate.

Everything was so delicious! Our favorite hands down was the spiced tile. It legitimately tasted like a creamy chocolate chai latte in your mouth. We were squealing in our seats, describing the hints of cinnamon and vanilla undertones. We're pretty much chocolate connoisseurs!
Jess holding up the lovely spiced tile. Two pretty things in one picture!